
Retro Console Restoration: Why 'Recapping' is the Most Important Step in Preservation
Key Takeaways
-
Electrolytic capacitors have a 20–30 year chemical lifespan; most NES, SNES, Mega Drive, Game Gear, PlayStation, and original Xbox units are now at or beyond that window.
-
The three stages of failure we see daily in our Australian workshop: high ESR (weak performance), electrolyte leakage (smell and mess), and full motherboard rot (copper traces eaten away).
-
Original 1980s/1990s “brick” power supplies and hot 5V regulators accelerate this ageing; modern regulated 9V switchmode adapters dramatically reduce future stress.
-
Professional recapping and diagnostic services from Retro Sales are designed for long-term preservation, referencing our EESS Responsible Supplier status and multi-point testing process.
-
The process of restoring retro gaming consoles can address decades of wear, environmental damage, and component failure when caught early.
- We offer an Australian recapping service for most Retro Consoles - Replace capacitors service
What is a Capacitor?
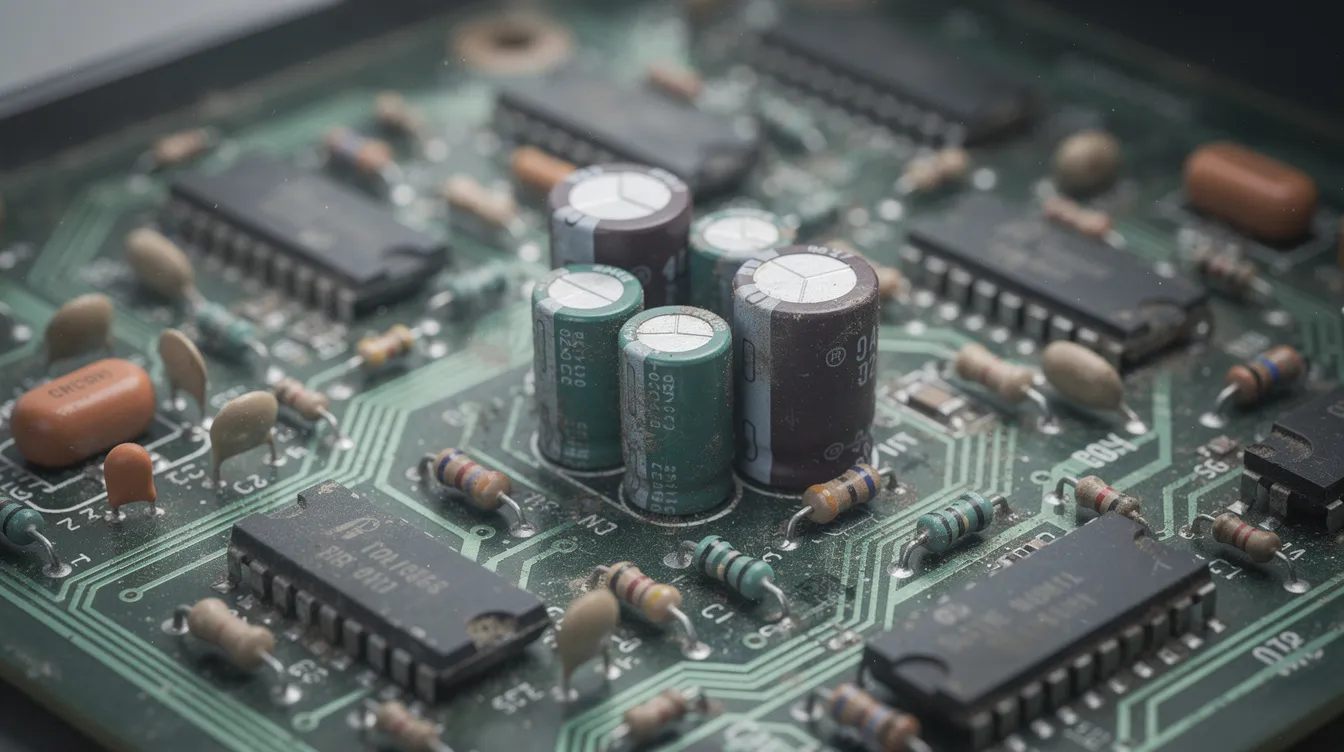
A capacitor is fundamentally two conductive plates separated by an insulator (dielectric), storing energy in an electric field. In retro consoles, they smooth voltage ripples, filter noise in audio and video circuits, and provide stable power to sensitive components like the CPU and graphics chips.
Electrolytic capacitors dominate 8-bit through early 2000s gaming hardware. They use aluminium foil anodes, paper separators, and a liquid or gel electrolyte to achieve high capacitance in compact packages. Importantly, electrolytic capacitors have a liquid electrolyte inside, which can leak or degrade over time, leading to failure. In contrast, other types like ceramic, polymer, and tantalum capacitors do not have liquid inside, making them less prone to this issue. The electrolyte is a chemically active, water-based solution that evaporates and breaks down over 20–30 years—even if the console sits unused on a shelf.
Common challenges in retro console restoration include failing capacitors, yellowed plastic cases, laser drive failures, and corroded electrical contacts. For yellowed ABS plastic cases, the Retr0bright process can be used, which neutralizes yellowed bromine compounds and restores the original color. Many retro gaming console problems are relatively straightforward to resolve, as components wear out and dust can build up over time. Consoles like the NES (1983), Mega Drive (1988), PAL SNES (1992), PlayStation (1994), and original Xbox (2001) rely heavily on electrolytics in their power, audio, and video sections.
Ceramic and film capacitors use solid dielectrics and rarely fail the same way—so preservation efforts focus almost entirely on electrolytics. Recapping is the process of removing old capacitors from a circuit board and replacing them with new ones, which is essential for maintaining the functionality of older electronics. Simply put, recapping is necessary because old electrolytics can fail and cause circuit issues. Common mistakes in the recapping process include installing capacitors that are not flush with the board, using the wrong footprint, or failing to clean the pads before soldering new capacitors, which can lead to poor connections or malfunction. In our workshop, this means systematically replacing all ageing electrolytics with modern, low-ESR, reputable-brand parts.
When sourcing replacement capacitors, it’s important to buy from reputable suppliers and avoid cheap, low-quality, or counterfeit options, especially those from China found on marketplaces like AliExpress and eBay. Adding to that, always check for trusted brands from Taiwan, such as Lelon, and South Korea, like SamYoung, which are known for their reliability and industry testing. Choosing the wrong supplier or brand can result in premature failure or even damage to your console.
Many effective tools and supplies for restoration are cheap and accessible, making it possible to achieve professional results without a large investment.
The Three Stages of Failure
We routinely measure capacitor health using ESR meters and visual inspection, but it's important to note that electrolytic capacitors can degrade fast when exposed to heat or stress. To properly assess their condition, always test and verify the results to ensure accuracy. Old capacitors degrade over time, leading to things like leakage, corrosion, and other issues that can damage the circuit board and affect performance. By the time symptoms appear on-screen or in audio, caps are typically far beyond spec.
Catching failure in Stage 1 or Stage 2 is far cheaper and safer than waiting for full motherboard rot. Following proper directions during desoldering and recapping helps ensure a successful fix, and the result is a restored and reliable retro console.
Stage 1: High ESR – Performance Drop Before Visible Damage
ESR (Equivalent Series Resistance) is the internal resistance of a capacitor. It increases as the electrolyte dries and plates corrode. At this stage, caps often look normal—no bulging, no leakage—but ESR reads 2–10× higher than design specifications.
We see this commonly on PAL SNES and Mega Drive units from the early 1990s. Typical symptoms include faint or buzzing audio, slight hum in video output, consoles resetting under load, and noisy 5V rail readings. High ESR turns capacitors into tiny heaters, accelerating their own decay and stressing the LM7805 regulator. Proactive recapping at this stage means low board damage risk and best long-term reliability.
Stage 2: Electrolyte Leakage – Chemical Attack Begins
As pressure builds or seals dry out, electrolyte seeps onto the PCB with a distinctive “fishy” or “cat pee” smell. Visual signs include crusty residue, darkened solder joints, and lifted pads around SMD capacitors.
The chemistry is aggressive: leaked electrolyte is alkaline (pH 9–11) and conductive, wicking under solder mask and dissolving copper traces. Cleaning supplies for console restoration include 99% Isopropyl Alcohol, cotton swabs, and microfiber cloths for effective cleaning. At this stage, restoration requires both recapping and chemical cleanup with thorough IPA washing and acid neutralisation.
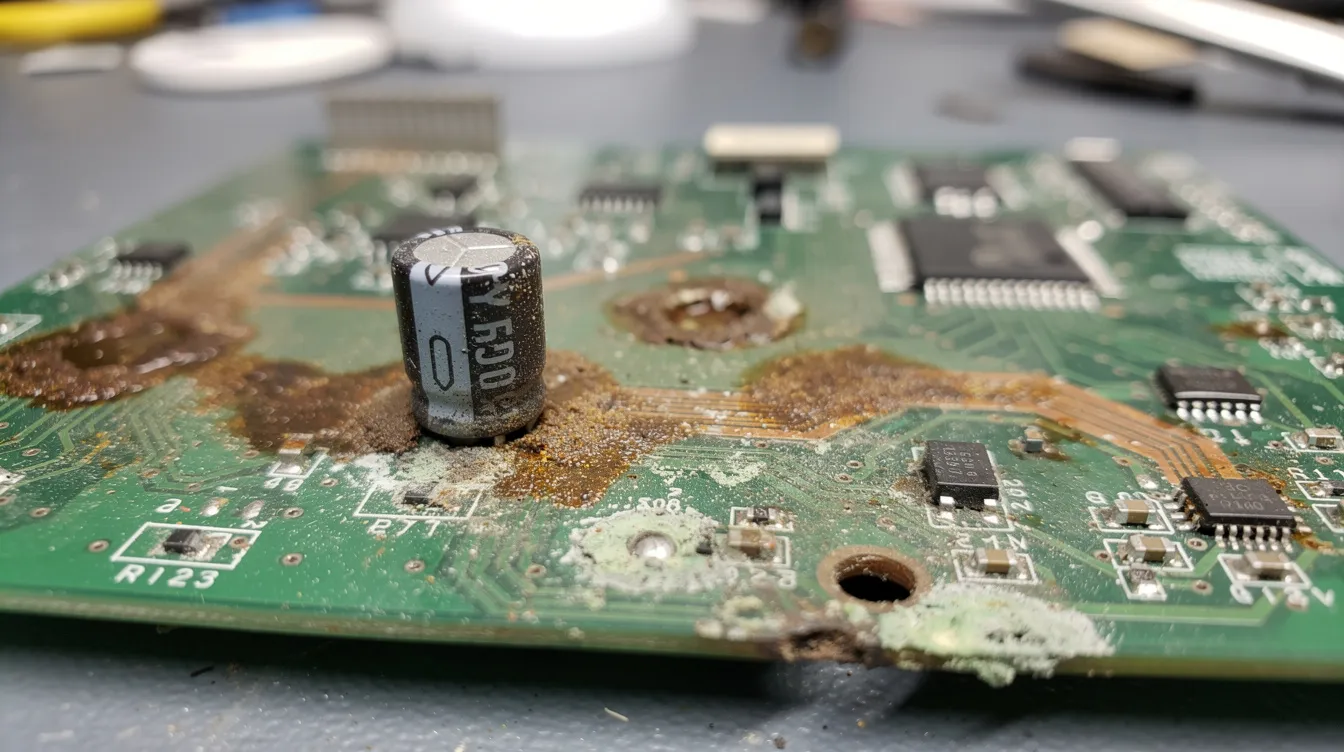
Stage 3: Motherboard Rot – Structural Damage to Copper Traces
Motherboard rot is irreversible corrosion of copper tracks, vias, and component leads—often hidden under solder mask or ICs. Symptoms include random lockups after warming up, missing controller inputs, one colour channel missing on RGB output, or black screens.
Original Xbox “clock cap” failures and badly leaked Game Gear boards are prime examples where we routinely see severe trace and via damage. Once rot is advanced, a board may never be 100% reliable again, reinforcing why early recapping is the most important preservation step.
Ticking Time Bombs: Notorious Consoles
Even “working perfectly” consoles from the 1990s and early 2000s can already be in Stage 1 or Stage 2, especially if used with original power bricks and stored in warm Australian climates. We offer comprehensive retro console restoration services and stock a wide range of replacement components for these notorious consoles. In addition to repairs, we also sell retro consoles, games, and accessories to help you complete your collection. For more detailed troubleshooting or safety instructions, refer to our dedicated restoration guide page. Check our current inventory or book your restoration service today to ensure your classic system gets the care it deserves. Here are the worst offenders we encounter.
The Original Xbox “Clock Cap” Catastrophe
Original Xbox consoles (launched 2001, boards 1.0–1.5) include a supercapacitor for maintaining system time when unplugged. This part is infamous for leaking—estimates suggest 95% failure by 2020. The electrolyte drips around the MCPX, BIOS ROM, and nearby traces.
Damage includes etched traces around the front-panel connector, corroded vias causing no power, or intermittent booting depending on board flex. Even if the console still works, remove this cap proactively. If leakage has started, we perform neutralisation, ultrasonic cleaning, trace testing, and full recapping.
Sega Game Gear: The Portable with Predictable Failure
Nearly every Sega Game Gear (released 1990 Japan, 1991 PAL) reaching our bench has failed or severely degraded electrolytics. Common symptoms: very dim or no screen backlight, distorted audio, or total no-power conditions.
Game Gear uses 40+ small SMD electrolytics concentrated in power, audio, and LCD sections. Our typical approach: full SMD recap with quality brands, deep cleaning, repairing eaten traces, and verifying power rail ripple. The longer you wait, the more severe the board damage.
PAL SNES: Video Noise and Colour Issues
PAL Super Nintendo units (circa 1992–1995 in Australia) are squarely in the capacitor failure age band. Typical complaints: rolling or flickering on CRTs, faint vertical “jailbars” on RGB, and humming on composite video.
These symptoms link to high ESR in 5V rail and video encoder circuits. We often pair a full recap with a modern regulated 9V power supply, which significantly cleans up the picture and improves overall stability.
Other Usual Suspects: 1990s and Early 2000s Consoles
Other consoles requiring pre-emptive recapping include Sega Saturn, early PlayStation 1 (PU-8 and PU-18 boards), NEC PC Engine Duo, and some early slim PS2 models. Any unit using dense SMD electrolytics near heat sources is at risk approaching three decades of service. For yellowed ABS plastic cases on these systems, the Retr0bright process neutralises yellowed bromine compounds using hydrogen peroxide gel and UV light exposure.
When caught early, these consoles recap cleanly with minimal board damage, extending their life well beyond 2035.
Why Modern Power is Your First Line of Defense
Many Australian collectors still run consoles on 30–40 year old unregulated transformers—one of the fastest ways to cook ageing capacitors. Original power bricks may become unstable or dangerous over time, providing inconsistent voltage that can damage internal components.
The Old “Brick” Power Supplies and Heat Stress
Typical 1980s–1990s power bricks for NES, Master System, and Mega Drive are simple step-down transformers with minimal regulation. These bricks can output 12–14V from a nominal “9V” rating when lightly loaded.
The excess voltage burns off as heat in the console’s linear regulator, which sits close to electrolytic capacitors on the mainboard. Sustained temperatures of 60–80°C dramatically accelerate electrolyte drying, shrinking realistic lifespan from 30 years to 15–20 with heavy use.
The LM7805 and Friends: Why the 5V Rail Matters
The LM7805 converts incoming 9–12V to a stable 5V rail. Input and output capacitors around this regulator smooth ripple and prevent oscillation—any ESR rise directly impacts stability.
Failure modes include consoles that boot only when cold, random resets with multiple controllers connected, or video noise under heavy load. High heat from over-voltage and poor ventilation discolours the PCB around the regulator—a red flag during inspections. Part of professional recapping is matching low-ESR replacement caps to regulator stability requirements.
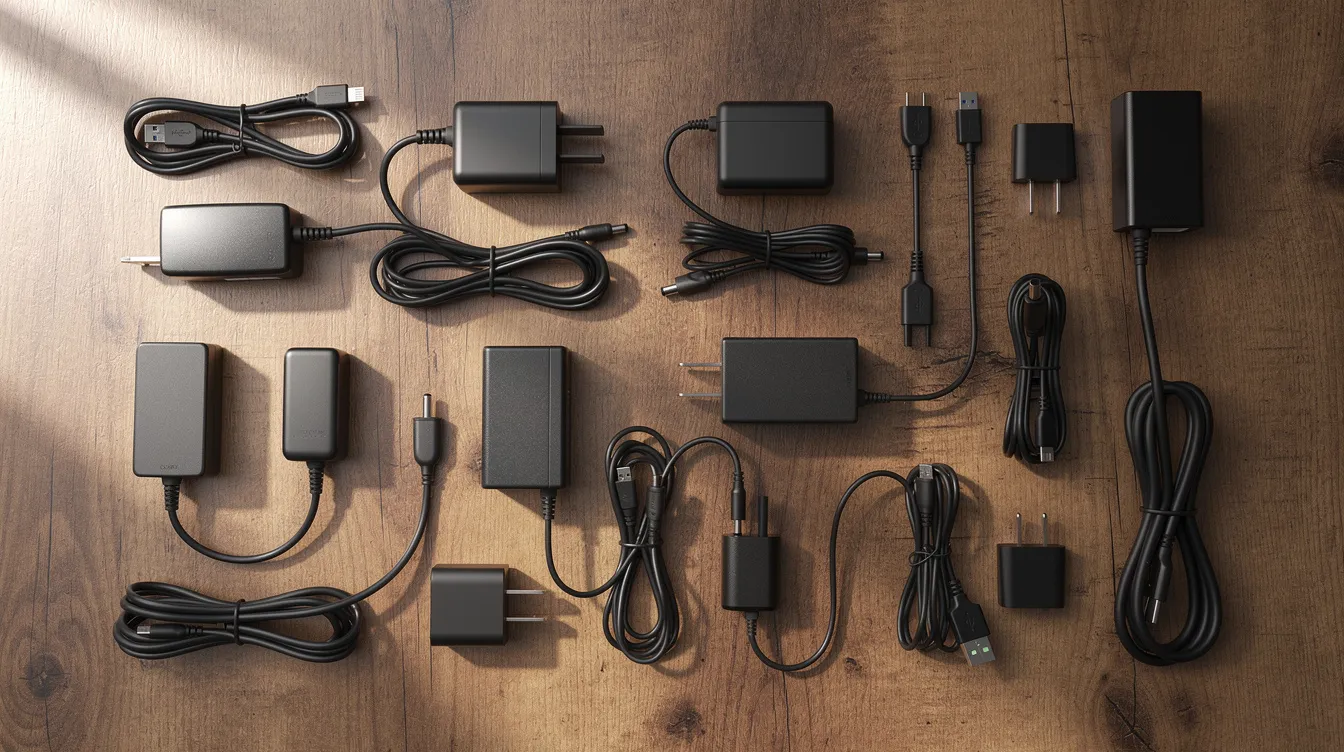
Modern 9V Switchmode Solutions for Preservation
A modern switchmode (SMPS) adapter delivers stable 9V regardless of mains variations and console load. Quality SMPS running into a 5V regulator significantly reduces both heat and ripple—we’ve measured 70–90% heat reduction in testing.
Not all modern adapters are equal: choose units correctly rated for current draw, with low noise, proper polarity, and RCM-compliant safety for Australian mains. Modern power is part of a holistic preservation package alongside recapping. We have a large range of modern power supplies for retro consoles.
The Professional Restoration Difference
Restoring a retro console involves a multi-stage process of disassembly, cleaning, component-level repair, and cosmetic refinement. With a growing awareness of best practices and safety in retro console restoration, many enthusiasts rely on community comment threads for troubleshooting advice and feedback on techniques. Older gaming consoles can be complex and delicate, so it's advisable to have a professional carry out repairs to avoid potential hazards. If you have questions or need expert help, feel free to get in touch for consultation or restoration services.
Multi-Point Diagnostic Testing Before and After Recapping
Our process begins with full functional testing: power draw on each rail, video and audio quality checks, controller ports, and thermal observations. We log ESR and capacitance on suspect capacitors to confirm failure and refine model-specific replacement lists.
Post-recap testing includes extended soak tests, repeated cold/warm boots, and verifying ripple with an oscilloscope. This builds on concepts from our Ultimate Guide to Retro Console Restoration. Photographing the disassembly process can help in reassembling the console correctly after restoration.
Component Selection: Why Brand and Spec Matter
We exclusively use reputable capacitor brands (Panasonic, Nichicon, Rubycon) with appropriate temperature and lifetime ratings. Electrolytic capacitors are the primary type that should be replaced during recapping, as they contain liquid electrolytes that can leak and cause damage.
When recapping, it is important to ensure replacement capacitors have the same capacitance value and voltage rating as the originals to avoid circuit failure. Common mistakes in the recapping process include non-flush installation, using incorrect footprints, and failing to clean pads before soldering new capacitors. Repair services for retro gaming consoles often include availability of spare parts, allowing for easier restorations.
Safe Board Handling, Cleaning, and Trace Repair
Our workshop uses ESD-safe benches and temperature-controlled stations. A desoldering station or gun is essential for electronics repair—options range from budget-friendly models like the ZD-915 to high-quality tools like the Hakko FR-301. Hot air stations like the Atten 858D and Quick 861DW have become affordable for tasks like replacing capacitors. Soldering stations such as the Hakko FX-888DX with adjustable temperature are crucial for this work.
When desoldering, it's important to protect other components or parts of the circuit from heat damage or contamination, especially when using hot air stations or hot tweezers.
Where motherboard rot has begun, we perform continuity checks, microsoldering, and jumper wire repairs, documenting serious damage with photos for customers.
EESS Responsible Supplier Status and Australian Standards
As an EESS Responsible Supplier, we maintain documented safety compliance for electrical equipment used with Australian mains power (230–240V). Our repairs account for local RCM compliance when testing consoles and recommending modern adapters.
This protects not only the console but also the collector’s home and connected equipment.
When to Choose Professional Service Over DIY
We recommend professional recapping for valuable limited editions, heavily corroded boards, multilayer boards (Xbox, GameCube), or when owners lack quality tools. If you have decided that professional service is the safer option, you can rely on expert help—view our dedicated capacitor replacement service for straightforward recap jobs.
For complex cases involving no-boot conditions or trace rot, our general repairs and service collection covers broader restoration needs. The retro gaming community increasingly recognises professional service as an investment in protecting rare or sentimental hardware.
Frequently Asked Questions
How do I know if my console really needs recapping if it still works fine?
“Still working” isn’t a reliable indicator—most electrolytics degrade silently. Key factors include age (20–30+ years), noisy video or audio, warm casing near power areas, and continued use with original bricks. Any regularly used console from the 1980s, 1990s, or early 2000s should at least be tested for ESR. Preventive recapping is wise for high-value or sentimental systems.
Can I just replace the visibly bad capacitors and leave the rest?
By the time one capacitor is visibly bulging or leaking, many others of the same age are already out of spec even if they look fine. We recommend full electrolytic replacement in power, audio, and video sections at minimum—this is more reliable and cheaper long-term than chasing intermittent faults later.
Will recapping change the way my console looks or sounds?
Quality recapping restores the console to what manufacturers intended: cleaner video, stable colours, less hum, and fewer resets. Customers are often surprised at how much better PAL SNES and Game Gear units perform after proper recapping and power optimisation.
Is it safe to keep using my original power brick after a recap?
While a recapped board will tolerate some abuse, old unregulated bricks still run hot and can shorten the lifespan of new capacitors over time. Pairing a freshly recapped console with a modern, regulated 9V adapter meeting Australian safety standards offers the best preservation outcome.
How often should a professionally recapped console be serviced again?
With quality capacitors and good power, most recapped consoles won’t need another full recap for decades. However, visual inspection every few years for dust, heat issues, or new corrosion is wise. If new symptoms appear, stop using the console and seek professional diagnosis promptly to prevent minor issues becoming major board damage.